Uncategorized

Sienna Van Conversion- Cabinets

Sienna Van Conversion- Cabinets

This Sienna van conversion- cabinets post is about making and installing cabinets in our Sienna van!

Once again I used Bruce Parks’s design. And again, Bruce Parks’s work is far superior to mine!

This is a beautiful piece of work by Bruce Parks.

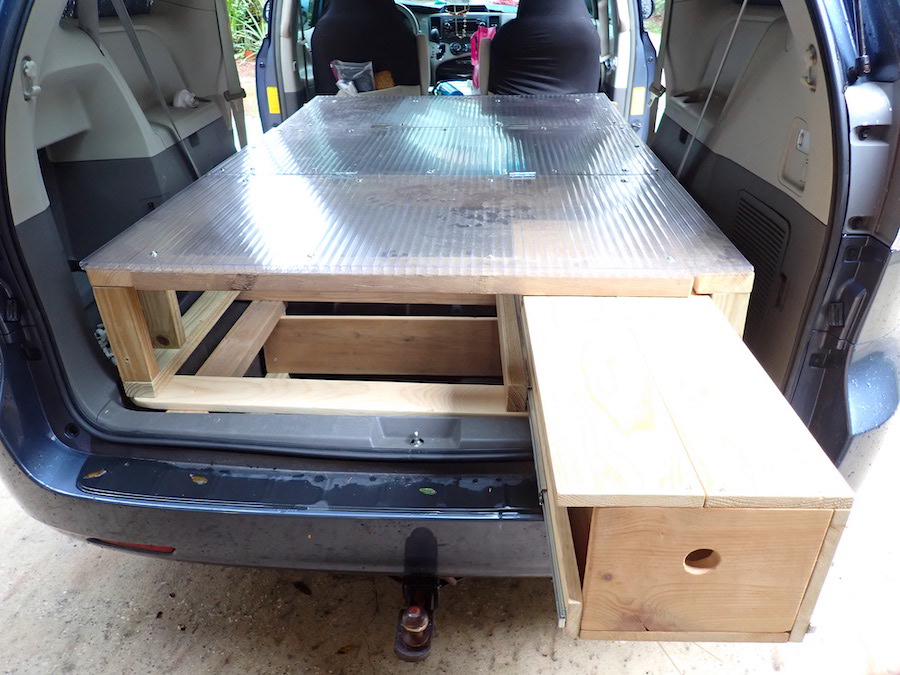
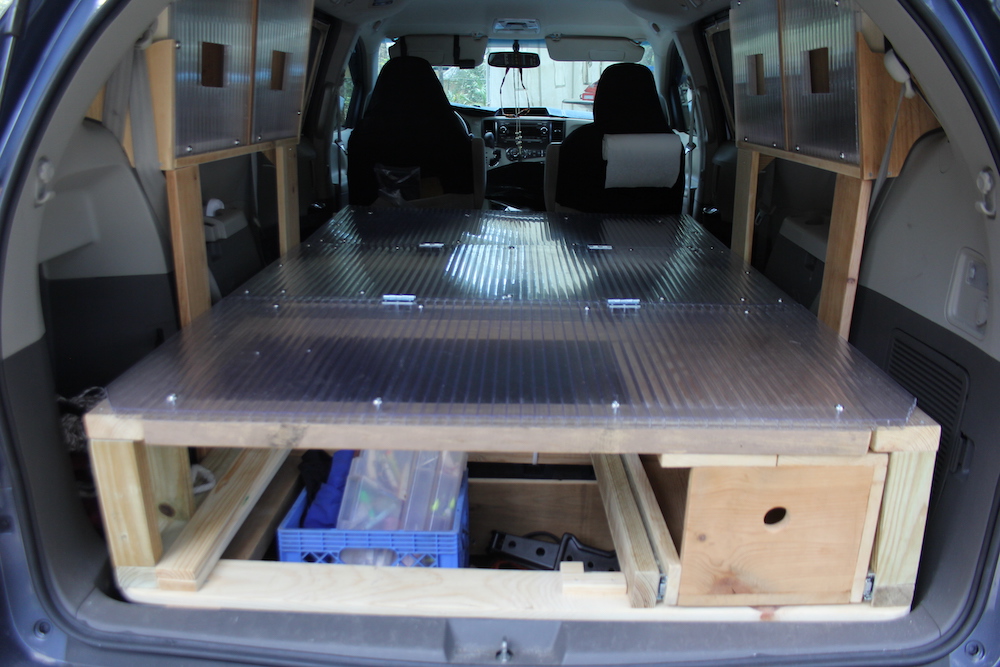
The four cabinet legs were first measured, cut, sanded, and screwed to the bed frame.

Making Templates

Once again I used corrugated cardboard to make templates. There were four of them for one cabinet. There are no flat surfaces where the cabinet was going, so the bottom, each side, and partition all needed templates cut. It was a slow process. Cut, check fit. Cut some more, check fit. For four pieces. Took an entire afternoon.

The diligent reader may recall in my last post I wrote, “although starting with the cardboard was an excellent idea, the cardboard cutout only approximates reality.” That was certainly true here!

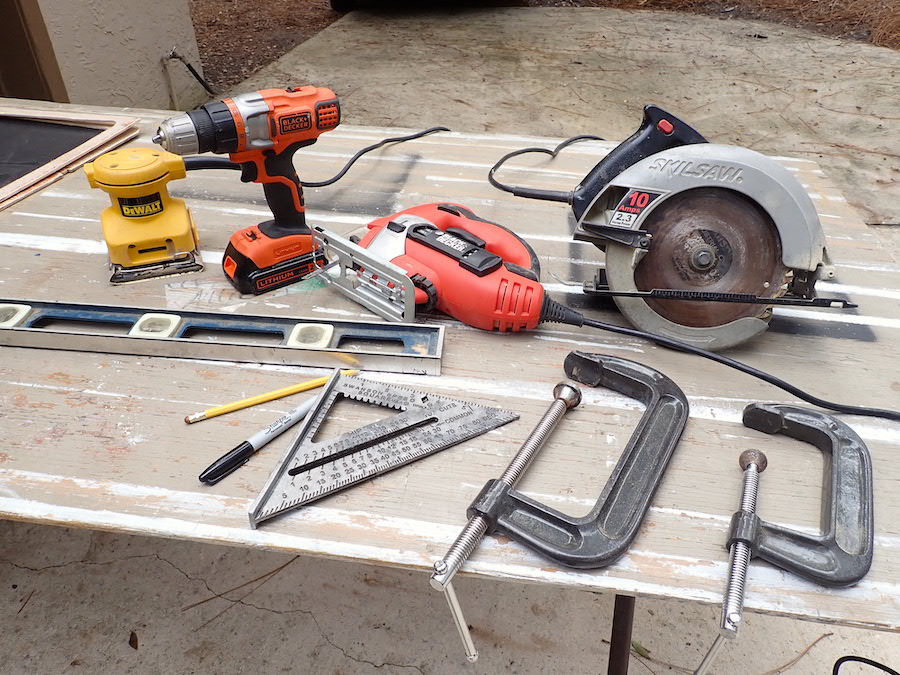
Once satisfied the templates were close, I traced the outline on a piece of 1″ pine board. Next a jig saw was used to cut out the piece I wanted from the rest of the board. Then there was sanding. Then we tried the fit.

Trying the Fit (and my patience)

None of the pieces fit the first time. More cutting, more sanding, another fit. Repeat as needed. There’s a good argument that, even now when the “finished product” is in the van, they don’t fit. 

My version of Bruce’s cabinet.

A trip to Home Depot happened, where, sadly, I had to purchase three eight foot 1″x2″ to make the frames for the cabinet fronts, and supports for the partition. It was the first wood I had to buy for the entire project! I also needed 1 1/4″ screws to hold everything together.

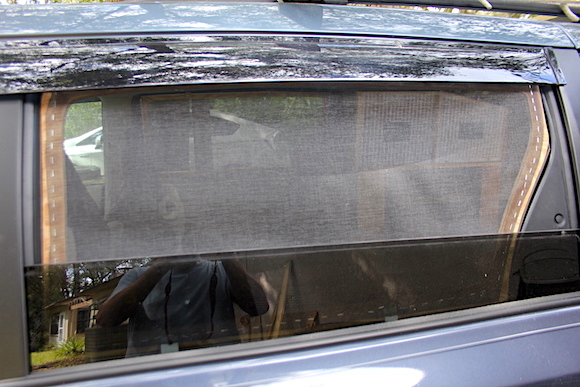
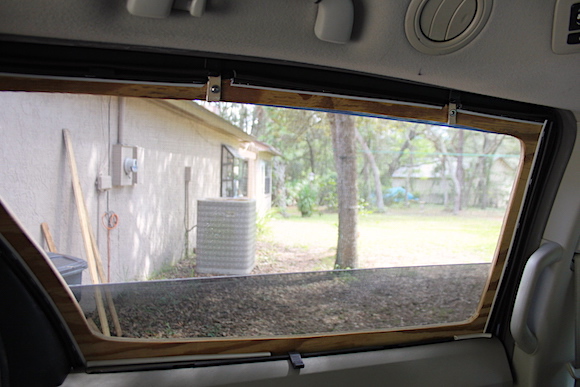
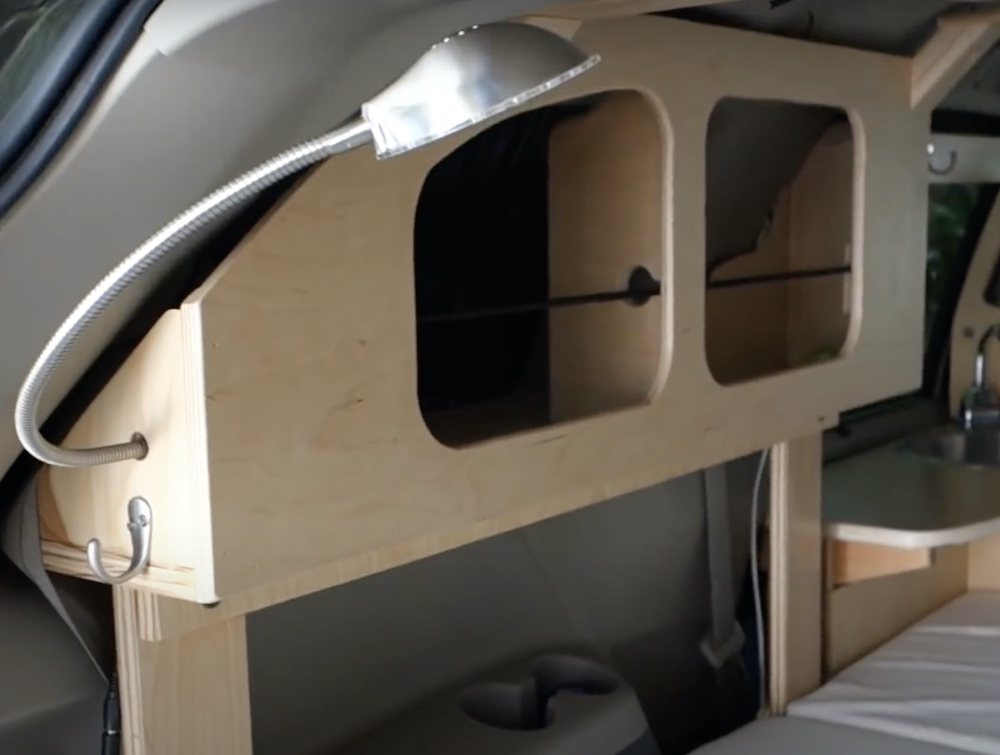
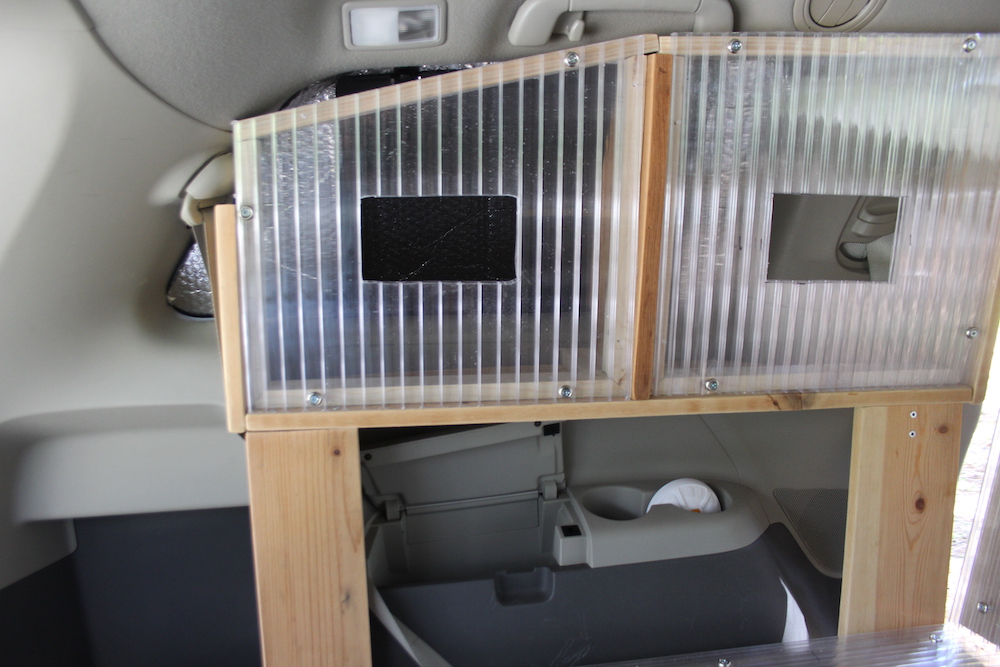
Once I had everything I needed assembly started. I attached the two sides and the partition to the bottom, then mitred the corners for the frame for the front. Once that was all done I measured the “windows” to get the sizes of the front panels, which I cut out of polycarbonate. A hole was cut in each polycarbonate panel- got to get your hand in and out of the cabinet!

I tried putting the cabinet on its legs. Didn’t fit. More cutting and sanding. More fitting. More cutting and sanding. Etc. Finally got it on there and used five screws to hold it down. Put the front panels on. Voila! Must say, not bad!

It took an entire day. The second one went faster- the templates were already cut, and all the problem-solving had been done. That one only took a half day. I cannot say it fits any better, however.

Looking in from the back hatch.

They look good (if not completely professional). They are secure. They don’t have huge capacity but they turn wasted space into storage space. If I were to do it over again I absolutely would.

The happy builder, resting in the van, glad the first phase is done!

There are odds and ends to finish and a trip to take before the electrical phase starts. We’re not done with the build just yet!

Thanks for reading about our Sienna van conversion- cabinets!

Blog

Sienna Van Conversion- Window Screens

In our last installment about the Sienna van conversion we discussed installing the bed. Little did I know, that was the easy part. The sliding door windows needed screens, and I wanted to put in cabinets along the back windows. At least I didn’t tackle anything challenging! This post is about Sienna van conversion- window screens

Make a Template

I figured that I could use a piece of corrugated cardboard to make a template, cut the frame out of a sheet of plywood, staple the screen to the frame, and install it in the window frame. Easy. 

Not so fast, dude.

I quickly learned that although starting with the cardboard was an excellent idea, the cardboard cutout only approximates reality. If you learn nothing else from these posts, please remember that. Also, the windows in my van do not go down all the way. You can’t template the curves at the bottom of the window very well.

I cut out the cardboard as best I could, put it in the window. The fit was close. I bought a half-sheet of the thinnest plywood Home Depot had, cut the frames, and stapled the screen into one of them.

To read more, please click here…


Sienna Van Conversion- Installing the Bed

In our last installment about the Sienna van conversion I discussed how the rear seat well of the Sienna needed to be framed before I could install the bed. Once that was done, and I had the slide-out drawer finished, it was time to install said bed.

Tools Used

Before we get there, though, I’d like to thank my tools. Simple though they may be, they have done me right. I’ve used (and will continue to use) two power hand saws, a basic Skilsaw and a Black and Decker jigsaw. I also used a small hand saw for a few jobs. I used a Black and Decker cordless electric drill quite a lot. Also used on every piece of lumber was a small DeWalt electric sander armed with 60 grit sandpaper. Rounding out the kit- a tape measure, a speed square, two C-clamps, a level, and various pencils and markers. I don’t have any kind of shop, so all work was done on an ancient folding table.

To read more, please click here…


The Sienna Van Conversion Begins

First off, this is my first blog about a Sienna van conversion, converting a soccer mom van into a killer mini-camper, and maybe becoming a vagabond too. Thanks for reading it!

During my adolescence, a question that often came up in our stoned/drunk conversations was, “What would you do if you knew you only had a year to live?” In May 2019 (age 66) I was diagnosed with idiopathic pulmonary fibrosis, an incurable and always terminal affliction. I guess my answer to the above question is to get a van and become a vagabond.

To read more, please click here…

Sienna Van Conversion- Window Screens

Sienna Van Conversion- Window Screens

In our last installment about the Sienna van conversion we discussed installing the bed. Little did I know, that was the easy part. The sliding door windows needed screens, and I wanted to put in cabinets along the back windows. At least I didn’t tackle anything challenging! This post is about Sienna van conversion- window screens

Make a Template

I figured that I could use a piece of corrugated cardboard to make a template, cut the frame out of a sheet of plywood, staple the screen to the frame, and install it in the window frame. Easy. 

Not so fast, dude.

I quickly learned that although starting with the cardboard was an excellent idea, the cardboard cutout only approximates reality. If you learn nothing else from these posts, please remember that. Also, the windows in my van do not go down all the way. You can’t template the curves at the bottom of the window very well.

I cut out the cardboard as best I could, put it in the window. The fit was close. I bought a half-sheet of the thinnest plywood Home Depot had, cut the frames, and stapled the screen into one of them.

Live in Three Dimensions

It didn’t fit. I was living in a two-dimensional world. The window and frame are curved. I needed to be in three dimensions, but didn’t know how to get there. I slept on it. 

By morning I realized that someone else surely had solved this problem. All I needed to do was search the ‘net and find their solution. My old buddy Bruce Parks had a youtube video about it.


He and I had solved the first parts of the project the same way. After he finished cutting his frame, he “added material” to make his frame match the curve of the window. He did not say or show how he did this. His video wasn’t much help as far as that went. He also put foam weatherstrip around the outside of the frame to seal it better. That flat out did not work for me. I made the Ace hardware store people happy by buying every kind of weatherstrip they had.

Bruce Park made me realize I needed thicker plywood. Being a homeowner, I had what I needed here already. I cut out and sanded a couple more frames, tried fitting them with the weatherstrip on the outside edge. ARRRGGGHHH!!!

Become an Expert on Weatherstrip

Susan and I went back to Home Depot to examine the weatherstrip selection. We got some vinyl weatherstrip. I stapled it around the inside edge of the frame, with the vinyl “lip” extending out. This filled most of the gaps. Judicious use of foam weatherstrip filled the rest.

sienna van conversion-window screen
The screen from the outside.
sienna van conversion-window screen
The screen from the inside.
sienna van conversion-window screen
Close-up showing the vinyl weatherstrip.

It’s an imperfect solution. But the screens are in the windows. I believe they will keep most bugs out. For now at least. Until I run into someone smarter that me!

Thanks for reading about our Sienna van conversion- window screens!

Sienna Van Conversion- Installing the Bed

Sienna Van Conversion- Installing the Bed

In our last installment about the Sienna van conversion I discussed how the rear seat well of the Sienna needed to be framed before I could install the bed. Once that was done, and I had the slide-out drawer finished, it was time to install said bed.

Tools Used

Before we get there, though, I’d like to thank my tools. Simple though they may be, they have done me right. I’ve used (and will continue to use) two power hand saws, a basic Skilsaw and a Black and Decker jigsaw. I also used a small hand saw for a few jobs. I used a Black and Decker cordless electric drill quite a lot. Also used on every piece of lumber was a small DeWalt electric sander armed with 60 grit sandpaper. Rounding out the kit- a tape measure, a speed square, two C-clamps, a level, and various pencils and markers. I don’t have any kind of shop, so all work was done on an ancient folding table.

My tools and workspace are basic.

Lumber Used

For those readers who hate throwing stuff away, here’s my take. You can keep useless stuff around forever. It gets in the way, collects dust and spiders, and is a pain in the neck. If you don’t use something for a year or two, it’s time to donate or sell it to someone who will use it.

Having said that, all the lumber I have used in this project so far is stuff I had hanging around the property, in some cases for decades. I live in a building, and lumber is building material! Makes sense! My out-of-pocket expenses so far have been limited to fasteners, the mattress, the window rain guards (which I need to install), and the potty.

Bed Installation

Back to the van. After removing the middle seats and clearing out assorted debris, I backed the van up to the garage. I got Susan and Cheryl to help me. We lifted the bed out of the garage and inserted it into the back of the van. Voila! An almost perfect fit!

campervan bed
The bed is in the van, and the kitchen box is pulled out.

Both ends of the bed fold up by way of hinges, allowing you to get at whatever may be lurking below. A Sienna has less space than say, an Airstream, so maximizing storage space is important.

folding van bed
Susan shows the front of the bed folding up. The rear does the same to allow access to the well. The seat trolleys gotta go, though!

We bought a full-sized tri-fold mattress from Amazon , but we won’t install that until just before our upcoming North Carolina trip.

In the meantime, I still have window screens and cabinets to build and install. Time to get back to work!

Thanks for reading about our Sienna van conversion- installing the bed!