minivan bed

Sienna Van Conversion- Installing the Bed

Sienna Van Conversion- Installing the Bed

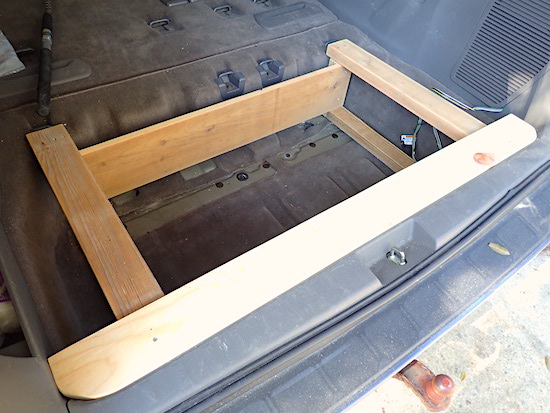
In our last installment about the Sienna van conversion I discussed how the rear seat well of the Sienna needed to be framed before I could install the bed. Once that was done, and I had the slide-out drawer finished, it was time to install said bed.

Tools Used

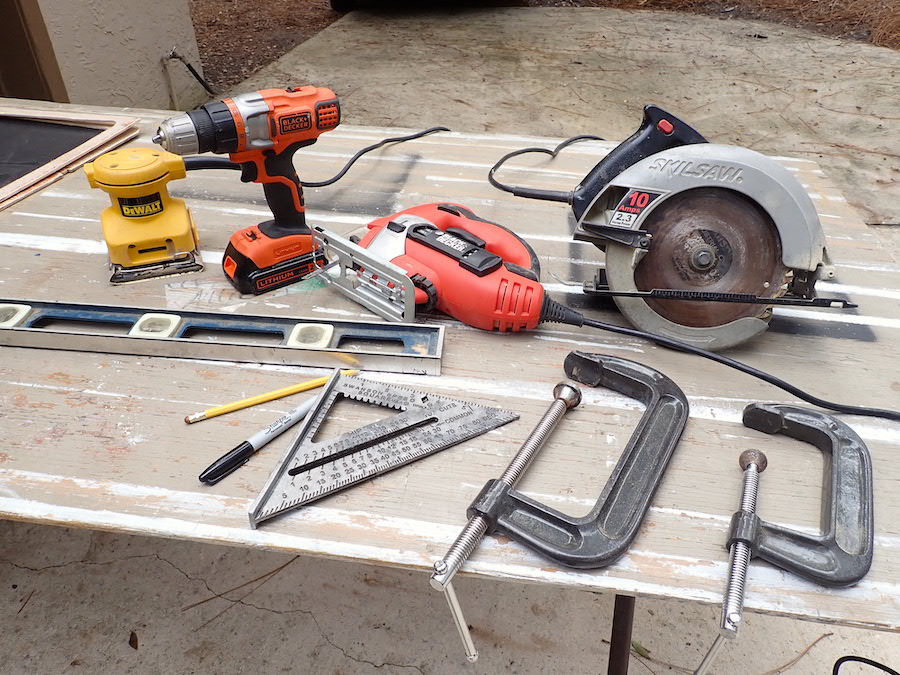
Before we get there, though, I’d like to thank my tools. Simple though they may be, they have done me right. I’ve used (and will continue to use) two power hand saws, a basic Skilsaw and a Black and Decker jigsaw. I also used a small hand saw for a few jobs. I used a Black and Decker cordless electric drill quite a lot. Also used on every piece of lumber was a small DeWalt electric sander armed with 60 grit sandpaper. Rounding out the kit- a tape measure, a speed square, two C-clamps, a level, and various pencils and markers. I don’t have any kind of shop, so all work was done on an ancient folding table.

My tools and workspace are basic.

Lumber Used

For those readers who hate throwing stuff away, here’s my take. You can keep useless stuff around forever. It gets in the way, collects dust and spiders, and is a pain in the neck. If you don’t use something for a year or two, it’s time to donate or sell it to someone who will use it.

Having said that, all the lumber I have used in this project so far is stuff I had hanging around the property, in some cases for decades. I live in a building, and lumber is building material! Makes sense! My out-of-pocket expenses so far have been limited to fasteners, the mattress, the window rain guards (which I need to install), and the potty.

Bed Installation

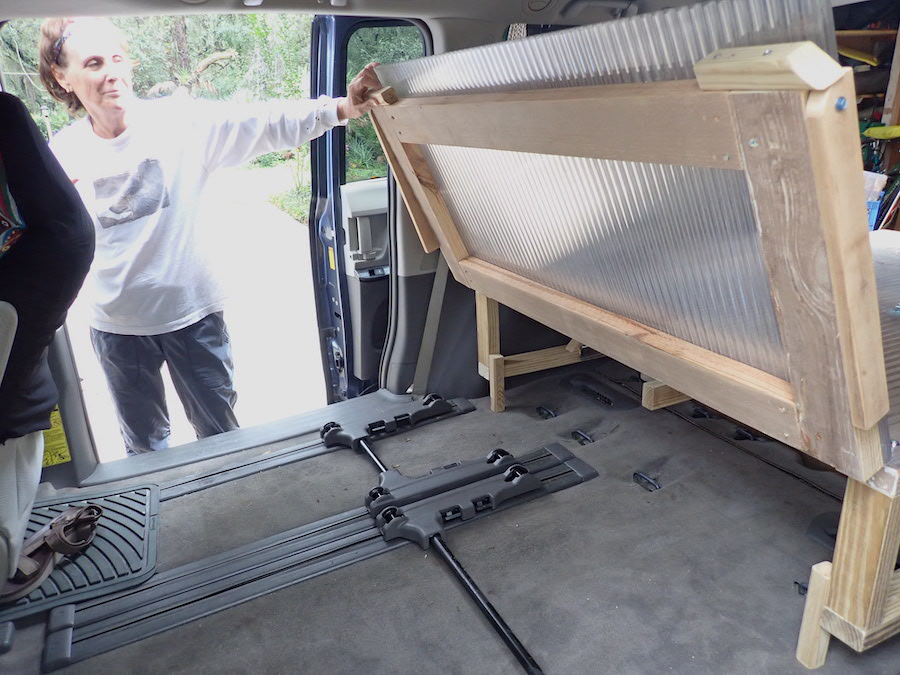
Back to the van. After removing the middle seats and clearing out assorted debris, I backed the van up to the garage. I got Susan and Cheryl to help me. We lifted the bed out of the garage and inserted it into the back of the van. Voila! An almost perfect fit!

campervan bed
The bed is in the van, and the kitchen box is pulled out.

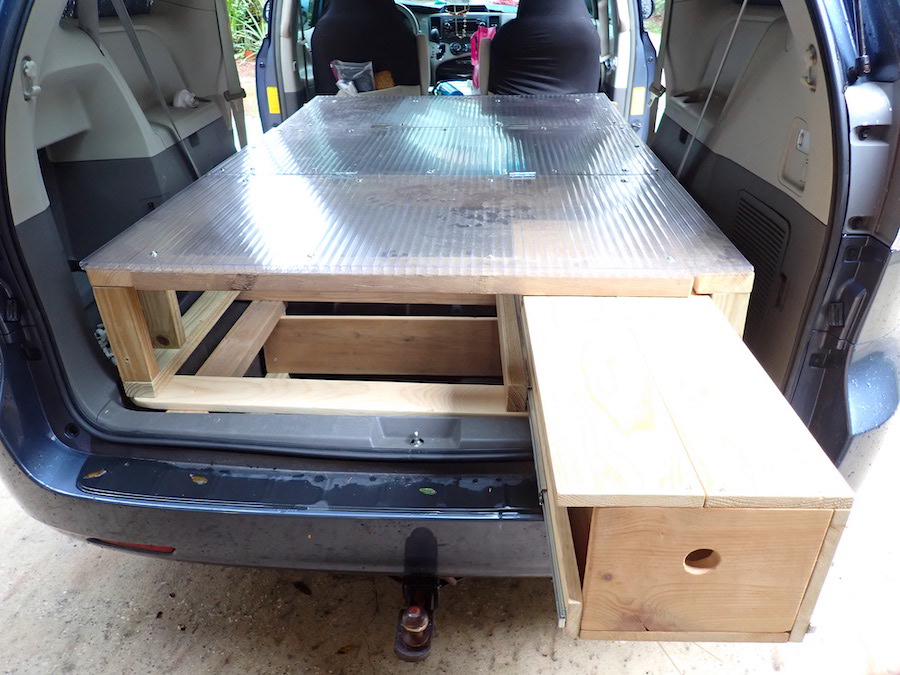
Both ends of the bed fold up by way of hinges, allowing you to get at whatever may be lurking below. A Sienna has less space than say, an Airstream, so maximizing storage space is important.

folding van bed
Susan shows the front of the bed folding up. The rear does the same to allow access to the well. The seat trolleys gotta go, though!

We bought a full-sized tri-fold mattress from Amazon , but we won’t install that until just before our upcoming North Carolina trip.

In the meantime, I still have window screens and cabinets to build and install. Time to get back to work!

Thanks for reading about our Sienna van conversion- installing the bed!

The Sienna Van Conversion Begins

The Sienna Van Conversion Begins

First off, this is my first blog about a Sienna van conversion, converting a soccer mom van into a killer mini-camper, and maybe becoming a vagabond too. Thanks for reading it!

During my adolescence, a question that often came up in our stoned/drunk conversations was, “What would you do if you knew you only had a year to live?” In May 2019 (age 66) I was diagnosed with idiopathic pulmonary fibrosis, an incurable and always terminal affliction. I guess my answer to the above question is to get a van and become a vagabond.

The Sienna Purchase

Susan and I had been talking about getting a Sienna and converting it into a camper since we had to cancel our trip to Spain because of the pandemic. We’re going to go cross country, visit Maxx and Cat. We talked about our budget, how many miles a used van had to have to be acceptable for our planned use, etc. Talk, talk, talk. Elephant talk.

In September of 2020 I brought my RAV4 in for service. While at the dealer, I thought I’d see what they had for Siennas. They had a 2014 LE, with 67,000 miles, $14,999. The high end of our talkie budget, but the mileage was perfect. When the service coordinator told me the RAV needed $1800 worth of work, and the salesman offered me $3000 in trade, I drove the Sienna home, as surprised as anyone with the speed at which I’d made the decision.

2014 toyota sienna
The new chariot, in beautiful blue.

First Priorities

My first priority for our new camper was to get rid of the back seats. I drove to the landfill after removing them. One hundred twenty pounds of useless weight, transferred from my vehicle to the cosmos. I would have thrown the middle seats away too, but Susan said no. Where we’re going to store them is a problem. Anyway, the back of the van now had a big well into which the seats had folded when not in use.

Next, we needed a bed. I looked at several Sienna van builds on YouTube. The bed I ended up building was this one- https://drive.google.com/file/d/1BlvZu7ZnWJszXVXKyM7uZX7eMM5FdzZ5/view – skipping the ratcheting part. For the frame I used all repurposed wood, stuff I had hanging around. Doing it over (and I may), I would use 2x3s instead of 2x4s to save weight. Didn’t have many 2x3s in stock, though.

For the sleeping platform I used polycarbonate panels, leftovers from the hurricane window protection project we’d done earlier this year. Seemed like a good way to repurpose the leftover material, and a good way to save some weight.

First Mistake

After the bed was “finished”, I tried putting it into the van. Since there was nothing supporting it in the well, the bed fell right into the hole. Crap! What seems obvious in retrospect had barely entered my consciousness before this little debacle. The well needed to be framed in order to support the back end of the bed. After sleeping on the problem I came up with a plan, and spent a morning framing the well.

The hole has been framed, and is ready to support the bed.

Next, I had to level the bed. The floor of the van slopes down from back to front. All the leg lengths on the bed frame needed to change to compensate. Directions on how to do this are found in this video-

That task is now finished. What remains? Take the remaining middle seats out, put the bed in, test it for fit and fitness. I’ll photograph the finished project in all its glory, and include it in the next blog.

Again, thanks for reading.